writing
Building XSourceNote: Source Notes in XcodeXcode 源码笔记插件 XSourceNote 开发记录
· Building tools & products
Translated from Chinese — .
On this page
PS: This idea isn’t very meaningful, so it will no longer be developed or maintained.
Background
This year I planned to study more source code — as promised, study source code. In January I mainly studied the source code of SDWebImage and YYCache, reading it line by line, and found quite a few good things. I wanted to record as I studied and share it, but it always felt like too much hassle.
Last year I made XBookmark, an Xcode bookmark plugin. I thought, I could make a plugin for taking notes on source code. The features are as follows:
- Take notes on a project.
- Take notes on a file.
- Take notes on one line or multiple lines of a particular file.
- Export to markdown format.
Exporting to markdown format means you can put it straight into a blog as an article. (Brainstorming: if everyone shared their notes to one website, you could all discuss a particular line of code…) (Let’s take it one step at a time. Too many ideas — both good and bad. To study source code, I still have to build a plugin… both good and bad.)
I’ll release my study notes on SDWebImage and YYCache or other source code all together later…
— Addendum on March 21, 2016 below –
Source Code
https://github.com/everettjf/XSourceNote
Result
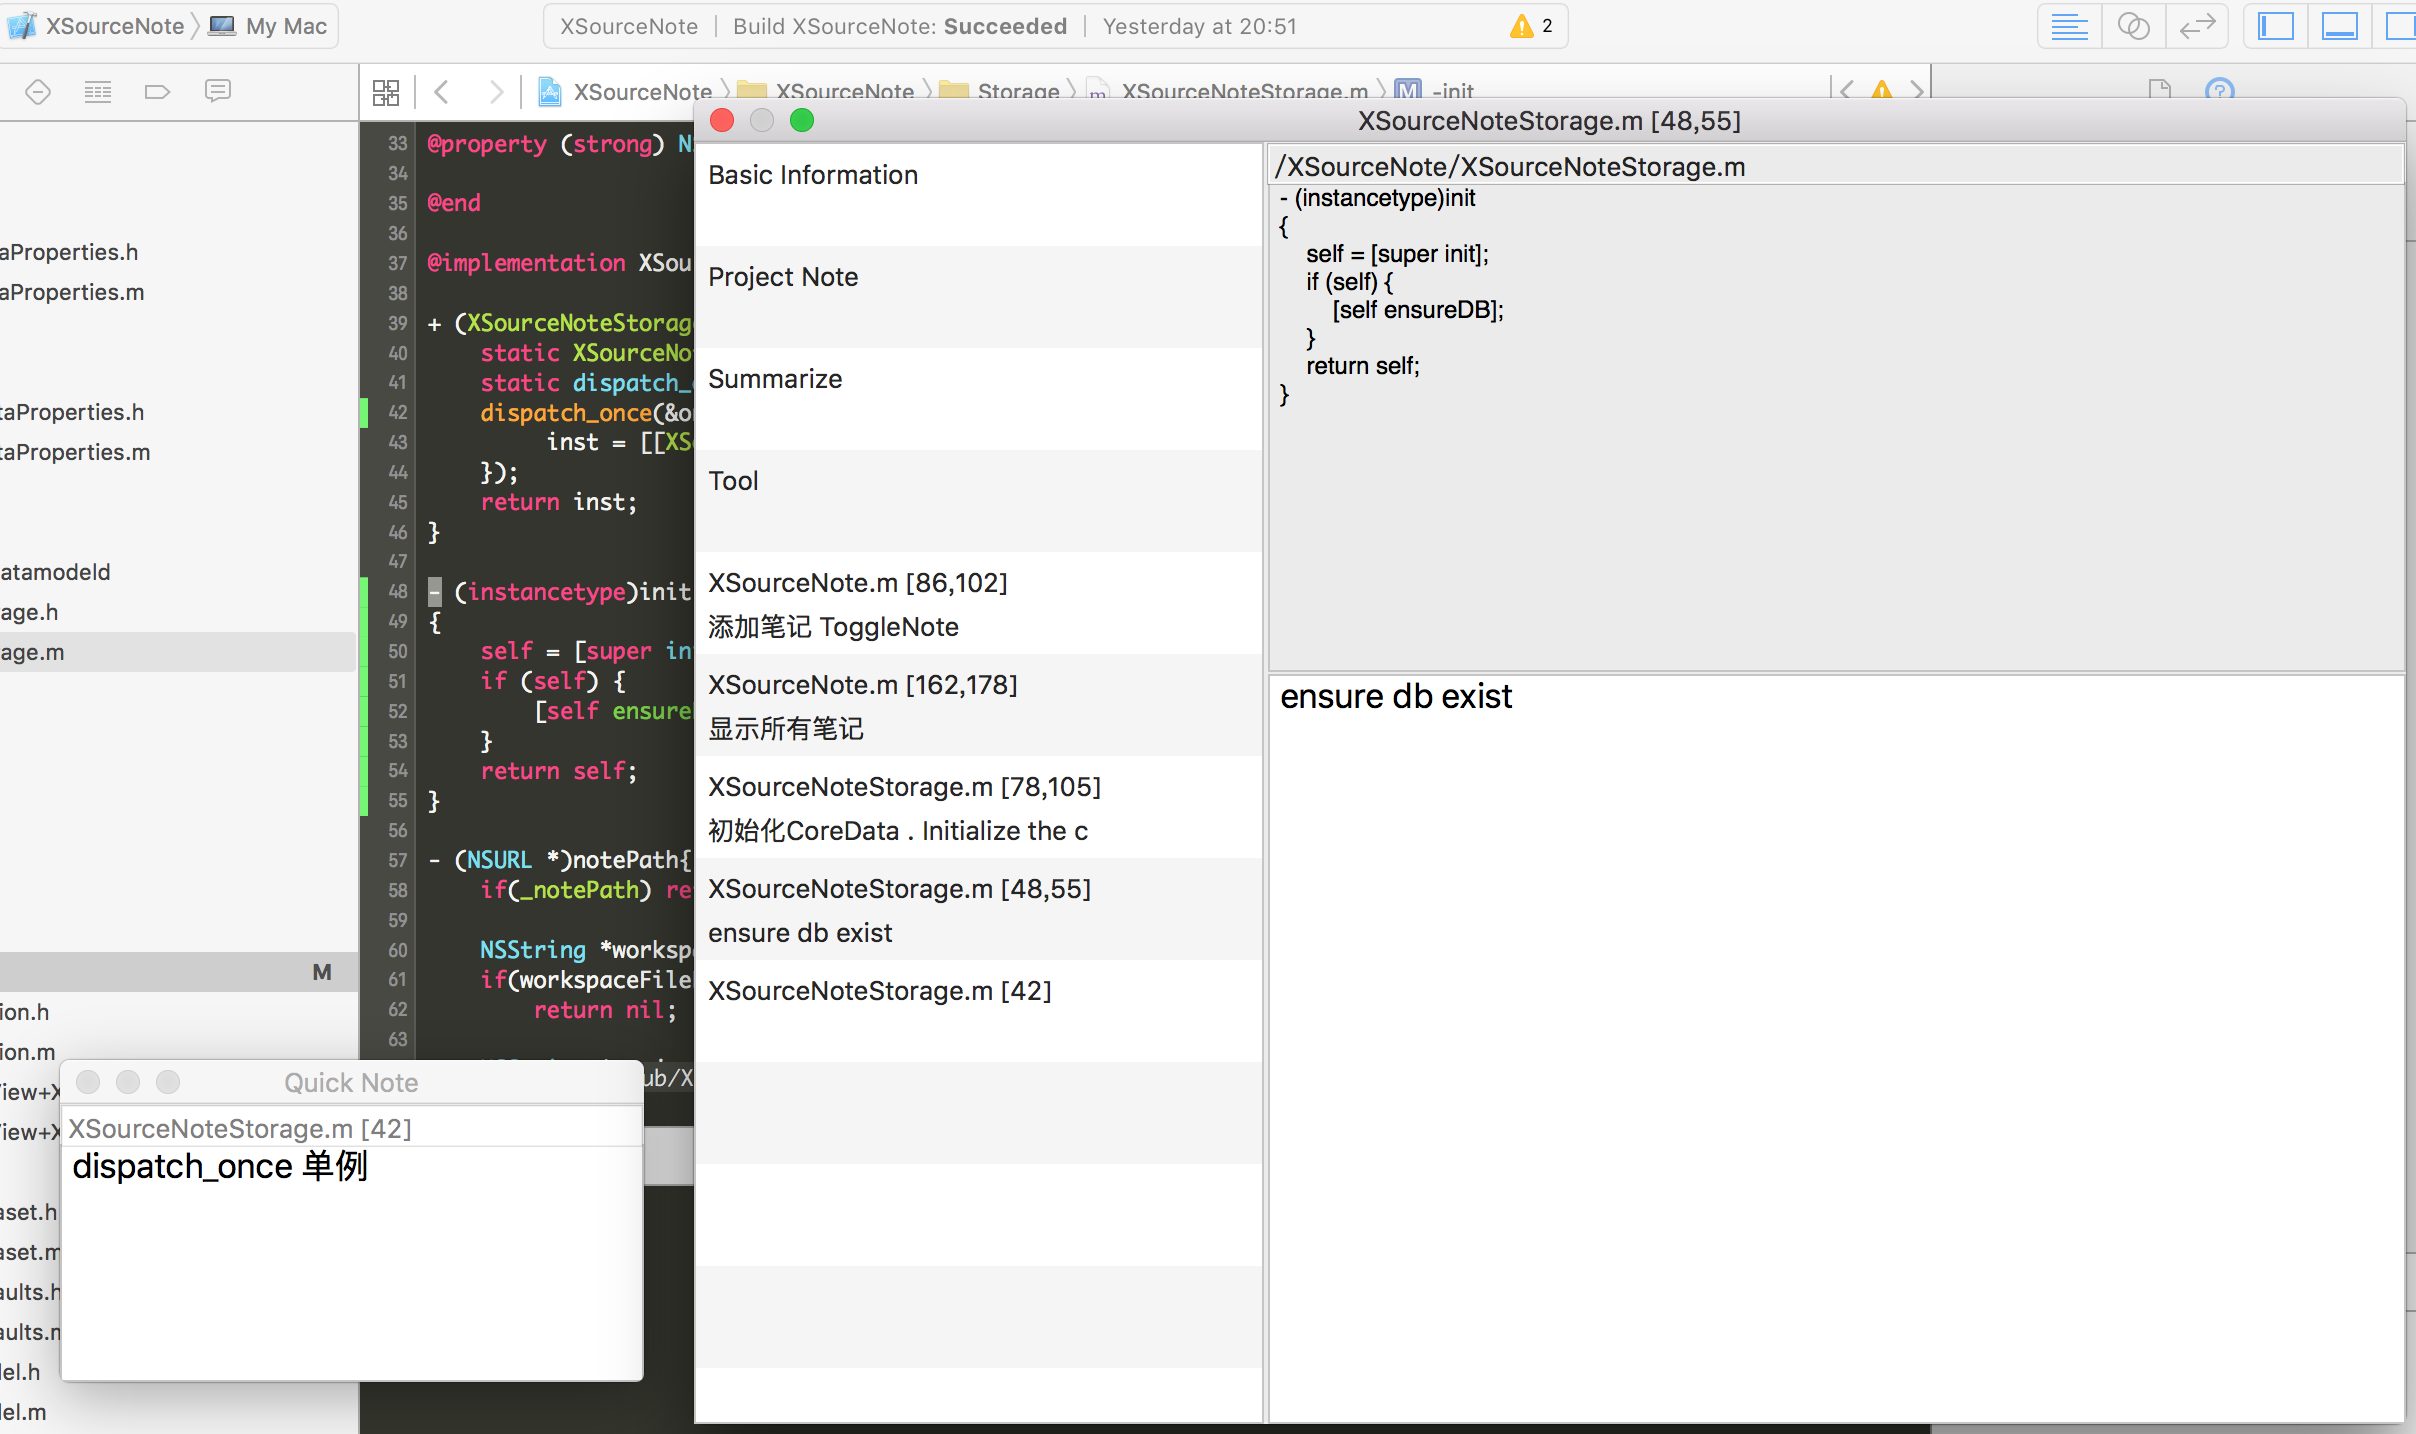
After this month of on-and-off development and constant use and modification, I can finally release the first version.
The result is as follows:
Installation
Just search for “XSourceNote” in Alcatraz and install it.
Usage
0. Menu
Xcode->Edit->XSourceNote
Or press the corresponding shortcut. (The shortcut can be modified in Tool.)
1. Configuration
For example:
- Open the project file located at /Users/everettjf/GitHub/XSourceNote with Xcode.
- Press the shortcut Shift+F4 to open the “Note List Window”, as shown below:
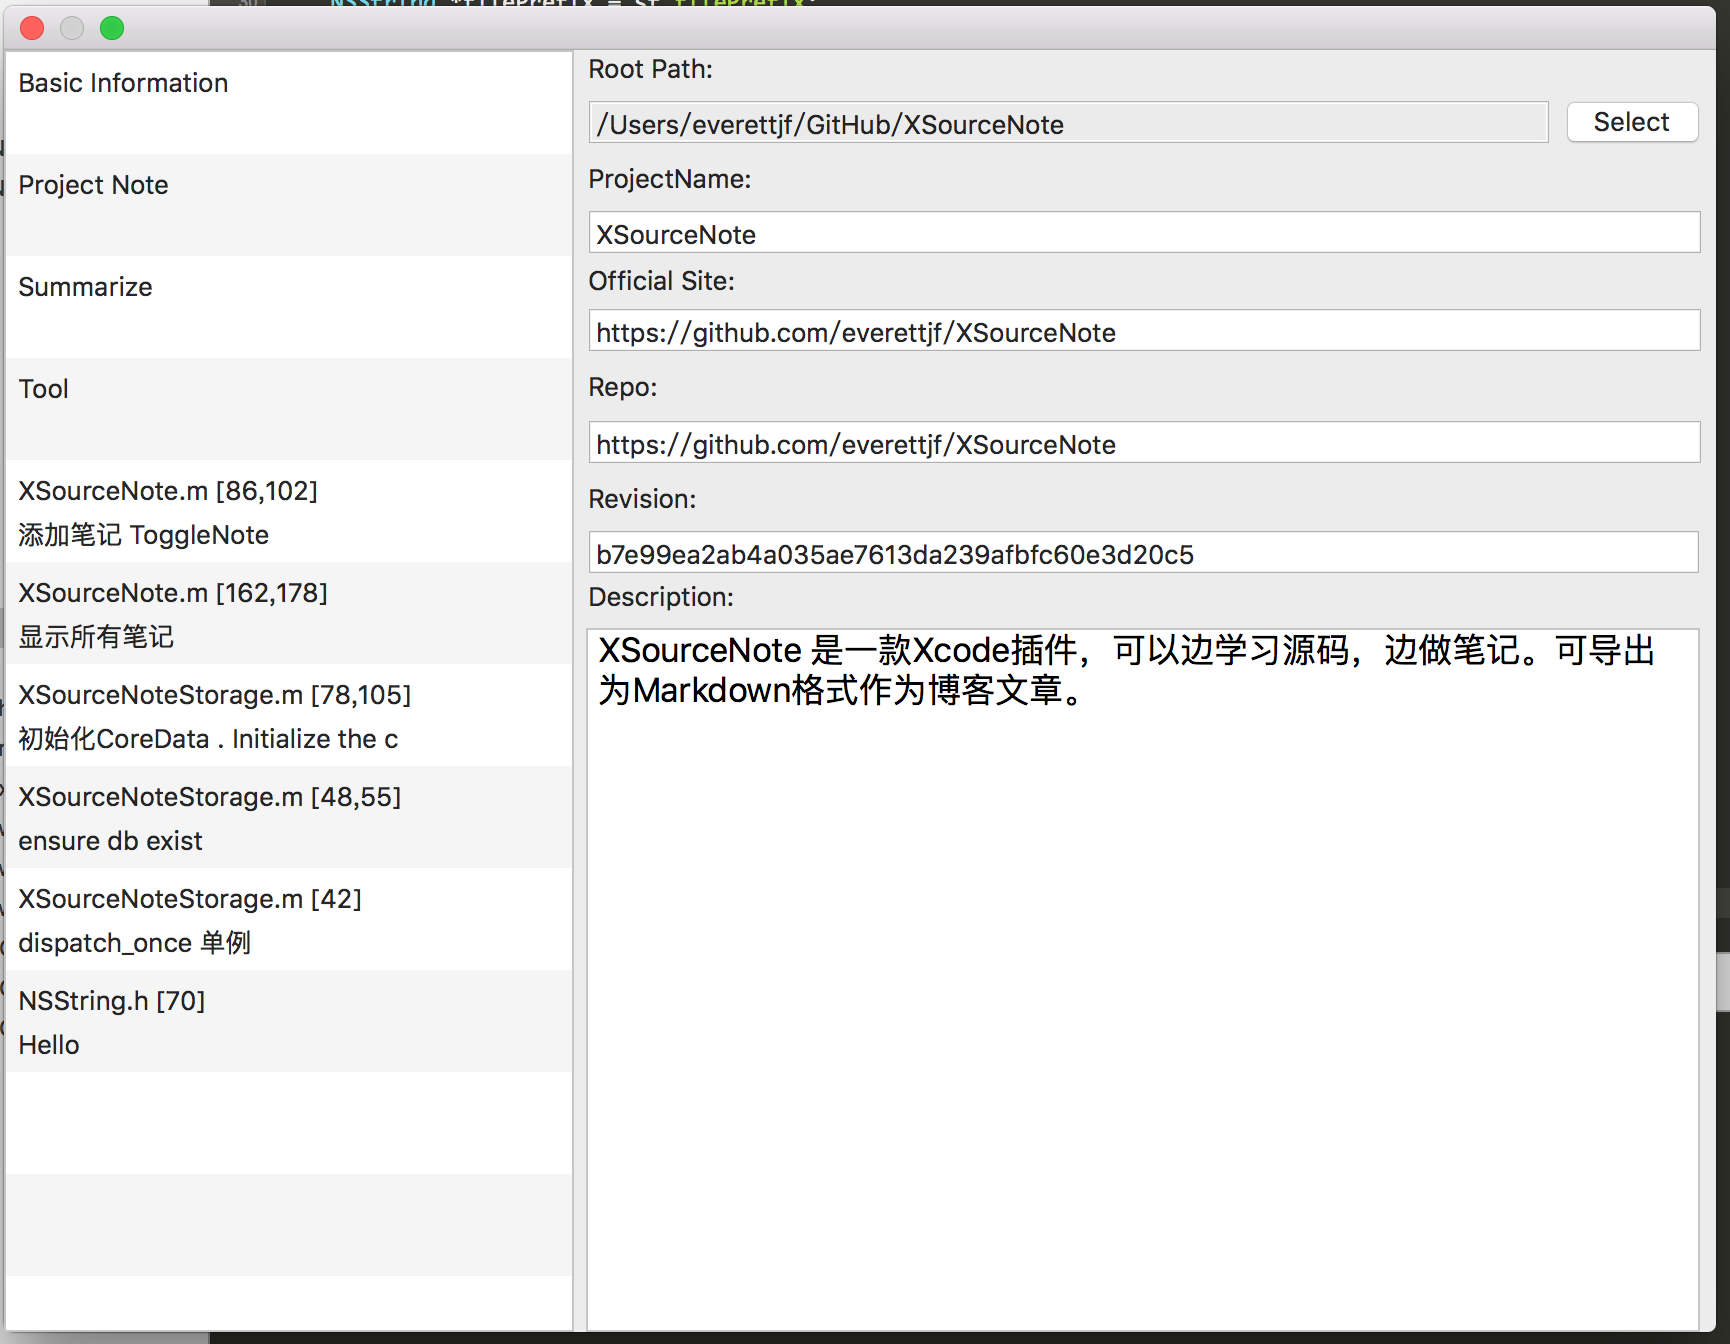
- Root Path (required): Select the local folder where the project file is located. (This is to convert the full file path to a relative path when adding notes. This can be optimized to find the .git directory and configure automatically.)
- Project Name: the project name
- Official Site: the official website name
- Repo: the code repository address
- Revision: the current revision (this is to uniquely identify the version of source code currently being studied)
- Description: a brief introduction.
2. Project Notes
Just take a note on the whole thing
3. Summary
The summary, when the Markdown notes are finally exported, is placed at the very end of the content.
4. Tools
You can configure the prefix of the Markdown note content. Many Markdown-based blog systems (such as Jekyll, Hexo) require some metadata configuration.
The button in the bottom-left corner can export the Markdown notes.
5. Line-of-Code Notes
1) Adding a Note
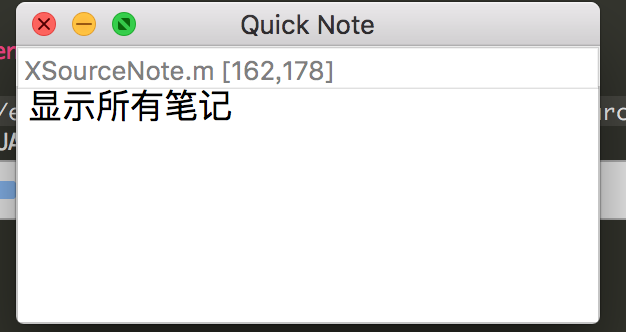
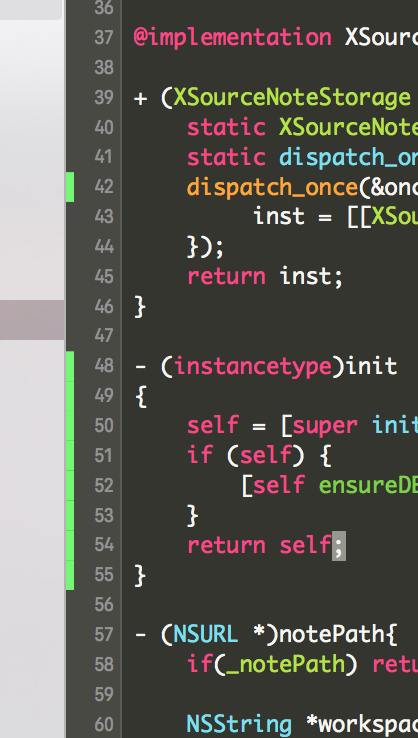
In the code editor, press the shortcut Command+F4 to add a note. XSourceNote will automatically record the line where the cursor is (single-line note), or the lines of the currently selected region (multi-line note). You can enter the note in this window. (It’s saved automatically when closed.) After adding, a green marker is added in the left sidebar of the corresponding line in the editor.
2) Viewing Notes
Still the window opened with Shift+F4: on the left, the notes for code lines are appended below the list.
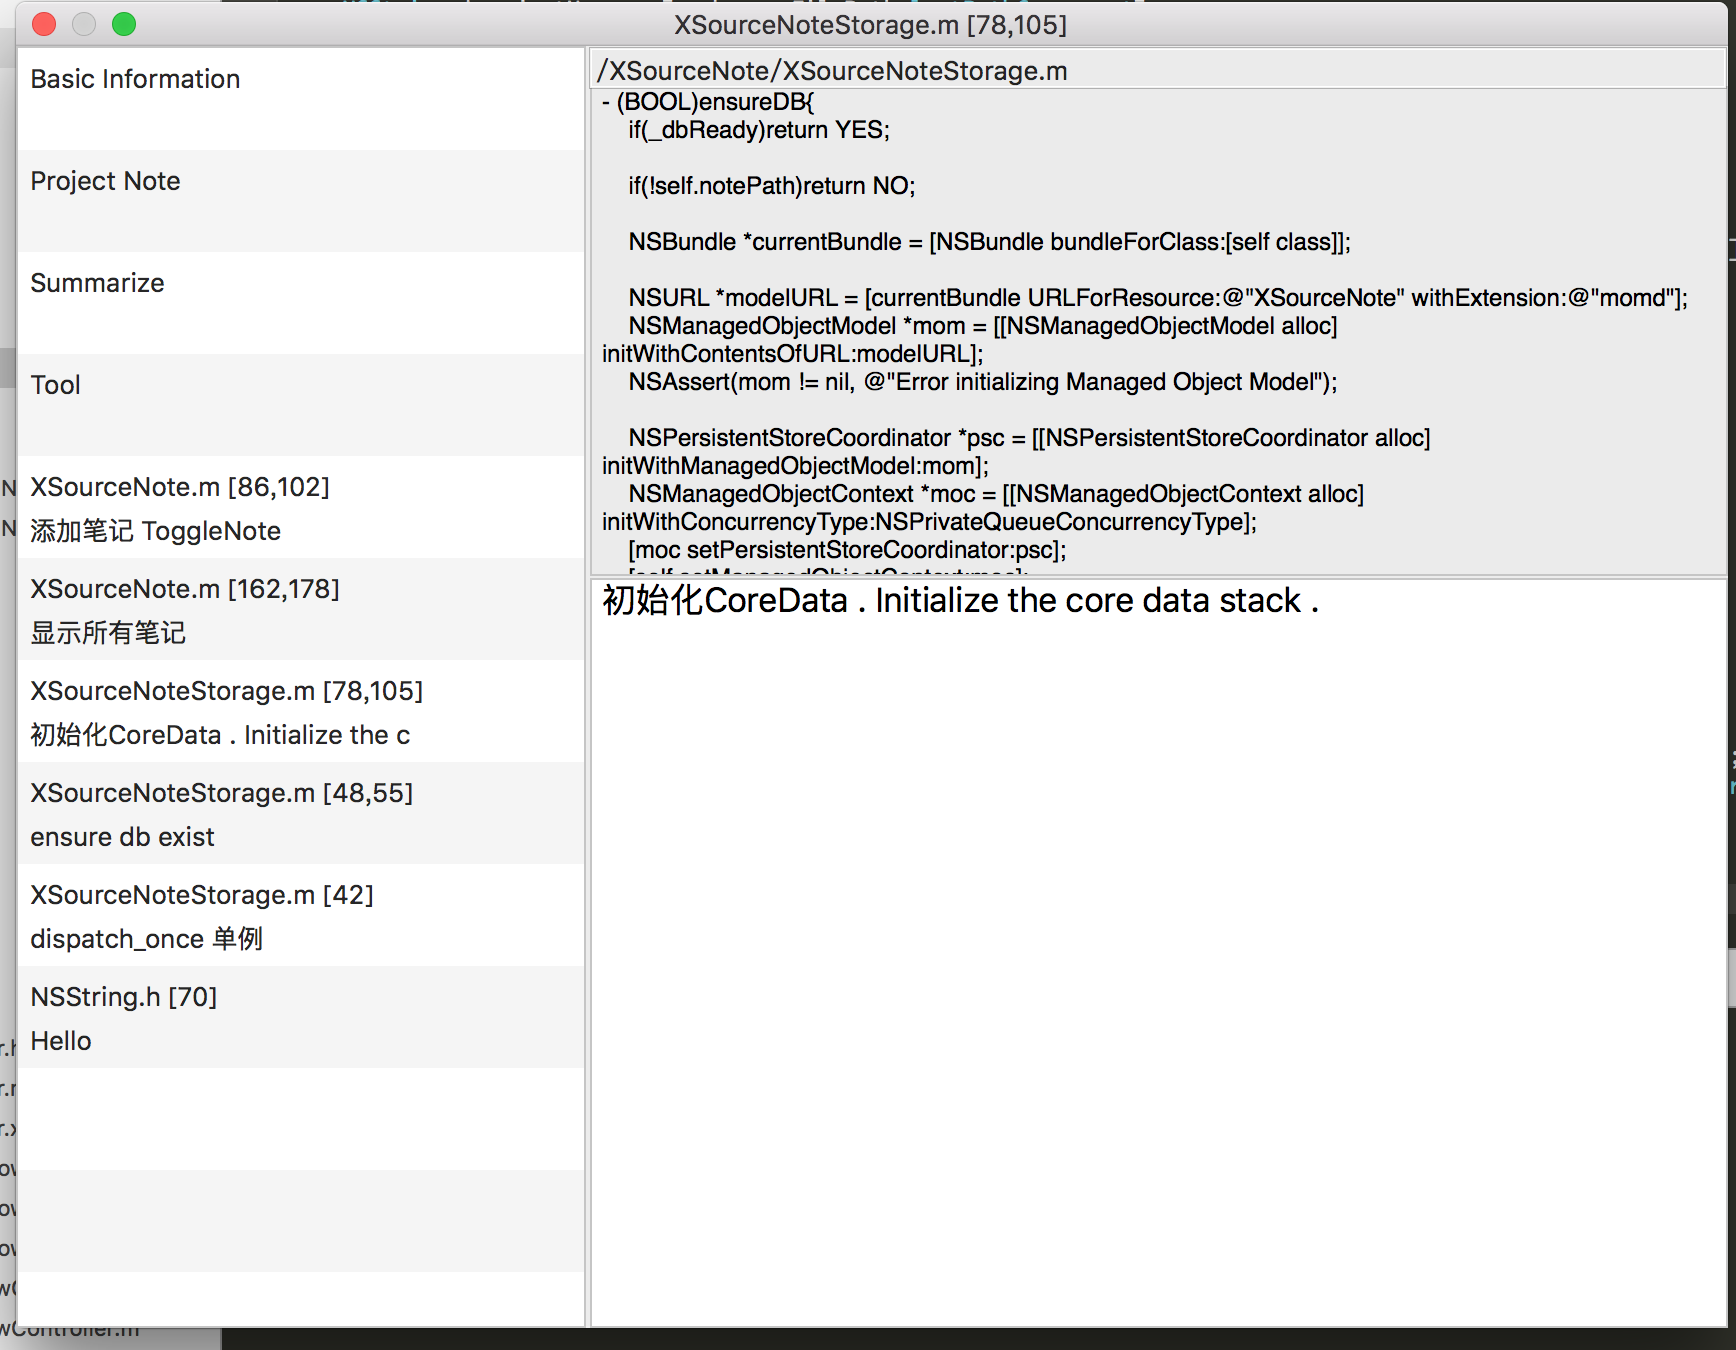
At the top right is the file’s relative path (if RootPath can’t be found, it will be the full path). Below that is the code on the line where the note is located.
At the very bottom you can edit the note. (The note is saved every 10s, or when you click an item in the left list, or when the window is closed.)
3) Exporting Notes
Click “Tool” in the left list, then the row of buttons below on the right. You can export to the selected file.
For format reference: format reference
Summary
The features are relatively simple, but it basically meets my needs for taking notes when studying source code.
There are still some areas that can be optimized:
- Sorting of notes.
- Coloring of the code region.
- Markdown format preview of the note region.
- Automatically finding the RootPath.
I’ll gradually optimize it as I use it going forward.
PS: 此想法意义不大,不再开发和维护。
背景
今年计划多学习一些源码,说好的源码学习呢。1月份主要学习了SDWebImage和YYCache的源码,一行一行的看的,发现不少好东西。开始想边学习边记录,分享出来,但总觉得麻烦。
去年做了个XBookmark,Xcode的书签插件。想想,可以做个对源码做笔记的插件。功能如下:
- 对工程做笔记。
- 对文件做笔记。
- 对某一个文件的一行或多行做笔记。
- 可以导出为markdown格式。
导出为markdown格式就可以直接放到博客当文章了。 (头脑风暴下,如果每个人都分享到一个网站上,都可以对某一行代码进行讨论呢…… ) (先一步一步来,想法太多,也好也坏。为了学习源码,还要做出个插件来……也好也坏)
对SDWebImage和YYCache或者其他源码的学习笔记,到时候一起放出来吧……
—以下2016年3月21日补充–
源码
https://github.com/everettjf/XSourceNote
效果
经过这1个月断断续续的开发及不断的使用修改,终于可以发布第一个版本啦。
效果如下:
安装
在 Alcatraz 中搜索“XSourceNote”安装即可。
使用
0. 菜单
Xcode->Edit->XSourceNote
或按对应的快捷键。(快捷键在Tool中可修改)
1. 配置
例如:
- 使用Xcode打开位于 /Users/everettjf/GitHub/XSourceNote 路径下的工程文件。
- 按快捷键 Shift+F4 打开“笔记列表窗口”,如下图:
- Root Path(必填): 选择工程文件所在的本地文件夹。(为了添加笔记时把文件全路径转换为相对路径。这里可优化为查找.git目录自动配置)
- Project Name : 工程名字
- Official Site : 官方网站名字
- Repo : 代码仓库地址
- Revision : 当前修订版本 (这里是为了唯一表示当前学习的源代码的版本)
- Description : 简介。
2. 工程笔记
就是整体做个笔记
3. 总结
总结会在最后导出Markdown笔记时,放在内容最后面。
4. 工具
可配置Markdown笔记内容的前缀。很多基于Markdown的博客系统(例如Jekyll,Hexo)都需要一些元数据的配置。
左下角按钮可以导出Markdown笔记。
5. 代码行的笔记
1) 添加笔记
在代码编辑器中按快捷键 Command+F4 可添加笔记。XSouceNote会自动记录光标所在行(单行笔记)、或当前选中区域的行(多行笔记)。 这个窗口中可输入笔记。(关闭后自动保存)。添加后,会在编辑器对应行的左侧边栏中添加一个绿色的标记。
2)查看笔记
仍然是 Shift+F4打开的窗口,左侧对代码行的笔记会追加到列表下面。
右侧最上面是 文件的相对路径(如果无法找到RootPath,则会是完整路径)。之后是笔记所在行的代码。
最下面可以编辑笔记。(笔记会每隔10s保存,或点击左侧列表时保存,或关闭窗口时保存)
3)导出笔记
点击左侧列表“Tool“,右侧下面一行按钮。可导出到选择的文件。
格式参考:格式参考
总结
功能比较简单,不过基本满足我学习源码时笔记的需求了。
还有一些可优化的地方:
- 笔记的排序。
- 代码区域的着色。
- 笔记区域的Markdown格式预览。
- 自动查找RootPath。
以后使用过程中慢慢优化。